Create Job Service |
  
|
Create Job Service |
|
Create a Job Service
A Job Service is an extended service option that users can request with jobs they upload to Go ePower. For example Staples and Tabs would be extended job services.
To Create a Job Service:
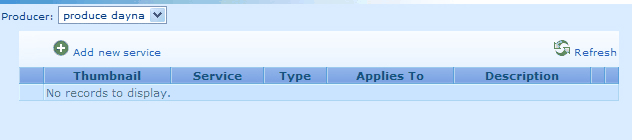
1.From the Backend Menu select Products>Public Products>Job Services.
Create a Job Service
2.Click the Add new service link .
Add new service link
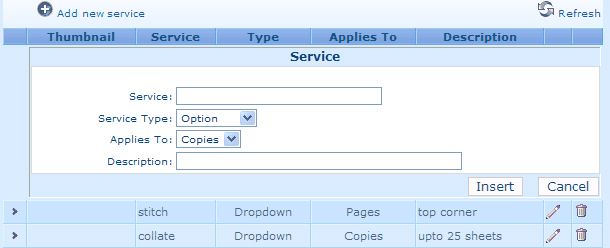
3.Fill in the fields for the service as follows:
Service: Name of the service to be added, e.g. Stapling or Tabs
Service Type: Select from either a dropdown list or Option (radio buttons). This will control how the service values (details) will appear to the customer.
Applies To: Pricing is applied according to this selection:
Copies: Multiply the price with the number of copies. Useful for stapling for example.
Pages: Multiply by the number of pages only. Example: Re-design work.
Total: Multiply by both the number of pages and the number of copies. Example: punching or cutting.
None: No multiplication just add the price. Example: Preparation charges
Description: A description that would appear with the service to the customer.
4.Click Insert to save the service.
Associate a Thumbnail to the service
To associate a Thumbnail to the service Click the edit icon ![]() and edit the entry by using the upload feature to upload a web image (.png, .jpg, .gif). Please note Go ePower makes no attempt is made to resize this thumbnail.
and edit the entry by using the upload feature to upload a web image (.png, .jpg, .gif). Please note Go ePower makes no attempt is made to resize this thumbnail.
Associate a Thumbnail to a service
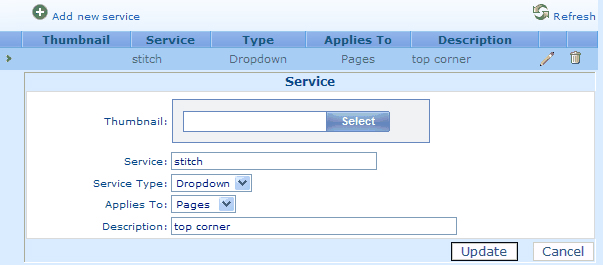
Add a Thumbnail to display an image to represent your product by clicking select and browsing your computer for the image and click Update.
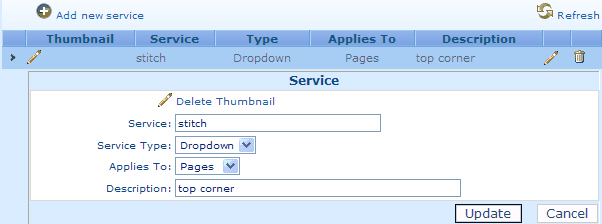
Delete Thumbnail
If you wish to change a Thumbnail that you have already uploaded Click the edit icon ![]() and select the Delete Thumbnail link.
and select the Delete Thumbnail link.
Delete Thumbnail
Creating Service details (Children of services)
Once you have Setup Job Services you need to Setup Child Records to display in the drop downs when the customer orders a specific Job Type with specific services for example, if you had a service called “hand collating” there would be a different charge for hand collating 5 sheets and collating 20 sheets. Each of the variations in charges in different services would be reflected in different child records.
To create Children of services (Child record) for a Job Service:
1.Click on the expand icon ![]() next to the Job Service. Child records are variances that can be applied to a job for Public jobs these could include stapling or collating.
next to the Job Service. Child records are variances that can be applied to a job for Public jobs these could include stapling or collating.
2.Click the Add new service detail link.
3.Enter the service name.
4.Select the service type:
Option: Radio Buttons List, Dropdown, Dropdown List
5.Select options to apply service to.
Option: The price is multiplied by the ( number of pages) x (number of pages)
None – The price is added as is without multiplication
Name of the option, e.g. if the Service was Stapling then this could be either ‘None’ for no stapling or ’1 Staple at Left Corner’ or ‘ 2 Staples at Left edge’ and so on.
6.Enter an optional Description
7.A thumbnail can be added to the Service by clicking the edit icon.
8.To add a price for each service, expand the service using the expand icon.
9.To add a price for each service, expand the service using the expand icon.
10.Fill the fields:
Service option: - Enter Name for the service detail
Value: Value for this option, this is hidden from the customer but will display to the producer when the job is created.
Price Method: Select from predefined Service pricing modules (more on this later on)
Default: If checked, this option will be the default.
Setup Price: Additional price for this particular option (on top of the Service price above).
11.Click on Insert to save the service detail.
Repeat the steps as many times as required.